

|

Welcome to the NWHS Article Archive
Articles are posted here one month after their appearance in the magazine, except for cover stories, which are posted concurrently with the magazine's release.
Copyright to all content is held by The Northwest Horse Source LLC and/or the article's author. If you would like to reprint or repost an article, please contact us. Feel free to link to any article on this site from your own blog or website.
Leasing: A Smart Alternative
Understanding the details is an important part of a successful leaseBy Ferronato ShenFor so many of us, having horses is a dream, perhaps one that has been with us since childhood. But the dream horses we create in our minds are not the same as the flesh and blood horses standing in front of us. Sometimes when people are finally in a position to own a horse, they get so excited that they take the first horse that comes along instead of trying many different horses to find the right one. I feel strongly that we should treat horse ownership like marriage and put as much thought into our future equine partner as we do our marital one. We may date multiple people before settling down and getting married. For me, the dating equivalent in horse ownership is taking lessons either from several different trainers, or if you have a trainer who is a good match for your personality, trying several different horses she has available. Another option is to lease prior to making a commitment to purchase. Advantages of Leasing Frequently, a rider advances to a place where she has outgrown her first horse and then is stuck needing to sell the horse; if she is so attached to her horse she can't bear the idea of selling him, she does not progress in her riding. On the other side of things, I have often located the horse of my client's dreams, only for her to realize months later that it wasn't really what she wanted in a horse. In either case, a lease would have been advantageous over buying. My own first lease was done on a verbal agreement, and when my trainer found out she sat me down and gave me a stern talking-to about liability and the importance of writing up contracts. I have no doubt most people leasing do not want to take the years and make the mistakes I've made to discover how to create a lease that is a win-win situation. The most important thing is to write everything down. Even the smallest detail is important, so leave nothing to chance. Essential Items to Include in a Lease Contract• Shoeing - How frequently and by whom? Is the owner or lessee responsible for payment? • Veterinary Care – The contract should specify all vets authorized to care for the horse, including dental, lameness, general care, homeopathic care, and several vets for emergencies. Phone numbers should be included right in the contract.
• Supplements – The contract should outline what supplements the horse is supposed to be on and specify a check-in every three months with the designated vet in case something changes. A copy of the consultation with the vet should go into the file as an addendum to the contract.
• Body Work – Especially for performance horses, frequency and designated practitioners for equine massage and chiropractic care should be specified in the contract.
• Equipment – The contract should list what—if any—equipment is provided and stipulate the type(s) of tack and equipment to be used on the horse. Ill-fitting or improper equipment can cause expensive and lasting problems.
• Injury – Each party's responsibilities in case of injury should be specified. The lessee should not be expected to spend a bunch of money right off the bat on dental and various other veterinary costs; it's the owner's job to have the horse in good shape prior to beginning the lease. On the other hand, the owner should not be expected to pay for rehabilitation necessitated by lessee negligence.
• Termination – Typical leases may include a termination clause requiring 30-day notice on either side, and possibly some additional responsibilities in case of termination.
• Work – The type of work the horse is allowed to do (jumping, dressage, trail riding, etc.) should be clear.
• Housing and Transport – For horses housed on the owner's property, conditions under which the horses are allowed to leave and what is required when they do should be specified. For example, if a horse is going to a show, the owner may require that the horse be accompanied by one of his or her trainers or have written permission releasing the horse from that requirement. For horses boarded at the lessee's property, specifications should include the address where the horse is to be boarded, required conditions of that property, and possibly a protocol for changing locations.
• Training – The owner may specify a trainer or list of approved trainers for the horse.
• Riders – Often, only specific riders are allowed on a leased horse. If a family is leasing a horse, each family member who is allowed on the horse should be listed. The contract will likely state that no one except the person or people listed is allowed to ride the horse outside of a lesson environment. If the horse is green or has known vices such as kicking or biting, a list of approved handlers should be included as well.
• Liability – If the contract has a "hold harmless" clause (a clause stating that one party will accept all liability in certain circumstances), make sure it is clearly defined. I also like to include a clause stating that if the horse should become available for sale during the lease that the lessee has the right of first refusal (the horse is offered to her for purchase first), then specify the exact terms of that right. Legalize Your DocumentAs an owner, have your contract reviewed by an attorney to make sure everything is legally sound. As a lessee, make sure you read the contract carefully and ask questions if there is anything you don't understand or would like to change. If changes are made to the lease agreement, then it goes back to the attorney to make certain the changes are done in an appropriate legal manner. What makes a lease successful is that everyone agrees up front on the parameters. The best interests of the horse should be the primary concern for everyone involved. For sample documents or assistance getting started there are many wonderful sites online, or you can email me for a free copy of one of my contracts (email available on website, below). Ferronato Shen is the owner of Three Treasures Farms, a non-profit holistic program dedicated to the rescue and rehabilitation of performance horses, as well as helping disadvantaged children through a partnership with horses. For more information about Three Treasures Farms, visit www.threetreasuresfarms.com. Labels: Feature Stories, ferronato shen, January 2009
Teaching Your Horse to Drag Objects, Part 2
When preparing a horse to pull a wagon or other objects, go step by stepby Raye LochertLast month, we covered the steps to get your horse used to having ropes across his body while moving. Once you've accomplished this and your horse is comfortable with the ropes, continue to work your horse in the round pen with your horsemen's rope as you progress to working with ropes and objects. Not so ScaryOnce your horse is desensitized to the rope across his hocks from both sides, you can teach him how to drag it. Take the honda (also known as hondo) off the saddle horn and lay your rope around the front of the horn so the honda end hangs on the opposite side of the horse and trails back about 25' behind him. Keep the rest of the rope in your hand. Send your horse off at a walk, letting the rope drag in the dirt behind him. If things get out of control, just pull your end until the rope slides off. Work this lesson until your horse can drag the rope comfortably from both sides. Once this is accomplished you can start dragging objects. Attach the least scary thing you can find to the rope and repeat the lesson above. This time if anything goes wrong, let go of the rope and it will slide off by itself. Keep attaching objects of increasing scariness and weight until your horse reacts calmly to all levels of pull. Driving from the GroundNow is the time for ground driving. The way I do it is by taking a couple of cotton lunge lines and running them through the stirrups up to the horse’s bit. At this point, if you have done all your work, the horse should not have any problems with the ropes running around his rump. Practice ground driving for a few sessions until you can walk, turn, stop and back up easily. Once you accomplish this, move to the next step. Take a thirty-foot lariat and attach it to the saddle horn. Ground drive your horse until he is comfortable with the rope dragging off his rump. If you have done all your prep work up until now, this should not take very long. Once he is comfortable dragging the rope, occasionally step on it to create a pull on the saddle. Once he is comfortable with that, employ a friend to pull on the rope. Slowly increase the pull over a series of pulls and releases until your horse is dragging your friend through the dirt on his or her feet, kind of like skiing. Letting GoWhen your horse is comfortable with this, have your friend run the rope through a tire, but do not tie it off. Allow the horse to drag the tire. If he becomes frightened, have your friend let go of the rope. The rope will slide through and the tire will stop. Never tie anything off on your horse until you are 100% sure he can handle it. Having your friend hold the rope with the ability to let go gives you a quick release in case of emergency. After the tire, try other objects such as timbers, sleds, and wagons. Again - never tie off until you are sure your horse can handle it. If your horse does react and the object is tied off, you are in for a wreck. It is a good idea to stay in a confined area during this training. With plenty of time you will be able to climb into the saddle and drag objects easily. If things start to go wrong, just let go of the rope. Sometimes it is a good idea to back your horse away from the object while dragging it. This allows him to keep an eye on it. It also offers a little more control since a horse can run faster with his rump toward the object rather than his eye toward it. Once all this is done, find a reputable driving trainer and show him or her what your horse can already do! Labels: January 2009, raye lochert, Trainers Corner
Spotlight on the News, January 2009
Doug Mills DVD Review Doug Mills has worked throughout his lifetime to become one of the best horsemanship clinicians. His ability to read and communicate with horses is the key. He has spent more than a decade teaching horses and riders in workshops throughout Canada, the U.S. and Europe. He credits many trainers and clinicians for his success, but the horse is still his greatest teacher. In his Progressive Training Program video series, he shows his secrets. Through careful explanation and demonstration he shows how to achieve a balanced-minded horse. He does not use intimidation or force. He is firm but respectful. His series is broken into three components: Liberty, Halter and Under Saddle. Each component has an instructional DVD, a troubleshooting DVD and a field manual to take outside while you work. It is well thought out and expertly delivered. To learn more, visit www.trainingthrutrust.com.
*** Northwest Horse Fair & Expo 2009 Celebrating 10 Years with “Extreme” Pride! Extreme Entertainment. Extreme Fun. Extremely Equine. All could describe the 10th Anniversary Celebration of the Northwest Horse Fair and Expo, presented by SilverLite Trailers, March 20 through 22, 2009 at the Linn County Fair and Expo Center in Albany, Oregon. Headlining the event are Craig Cameron’s Extreme Cowboy Race (TM) and the Extreme Mustang Makeover, presented by the Mustang Heritage Foundation. In addition to the “Extreme” entertainment at the event, a full line-up of world-class clinicians and trainers will provide daily clinics, including such stars as Craig Cameron, Kay Meredith, Linda Allen, Peggy Brown, Steve Rother, and TV and radio host and author Rick Lamb. For more information on the Northwest Horse Fair and Expo, go to www.equinepromotions.net or call 765-655-2107. *** Commemorate Horses Making a Difference with a Free* 2009 Equine Calendar from Farnam Dewormers The noble equine has been our loyal partner in work and pleasure wherever mankind has roamed around the world. To celebrate this relationship and to say thank you to customers for their loyalty, Farnam Dewormers is offering a beautiful 2009 Horses Make a Difference Around the World calendar. With a different photo each month, this calendar depicts some of the many partnerships we’ve enjoyed with our equine companions, plus it is the perfect size to take with you while pursuing your busy schedule.
The 2009 Equine Event Calendar is free, while supplies last, with the purchase of two doses of IverCare® (ivermectin) Paste from a participating Farnam Dewormers dealer. For more information call toll free (800) 234-2269 or visit www.farnamhorse.com.
Farnam – Your Partner in Horse Care *** Your Input is Needed in a Nationwide Survey on the Unwanted Horse Problem
The problem of unwanted horses is being studied through a nationwide initiative of the Unwanted Horse Coalition (UHC) with help from equine associations, veterinarians, breeders, state and local law enforcement, horse owners, rescue/retirement facilities, and other facilities using horses. The first step is an online survey. Everyone with an interest in the welfare of horses is encouraged to respond at http://survey.ictgroup.com/uhcsurvey/. With tens of thousands of unwanted, neglected and abandoned horses in the U.S., some say the problem is a fast-growing epidemic. However, much remains unknown. Currently, there are few documented facts about the accurate number of unwanted horses, their age, sex, breed, recent use, value or what happens to them in the long run.
A comprehensive view of the problem depends on representation from all corners of the horse industry. *** Cold Therapy - Ice is Still the Best! In a recent study conducted by DVM Magazine, various methods of cold therapy were evaluated for effectiveness, from high-tech units costing up to $5000 to simple buckets of cold water. Of all the methods, it was concluded that old fashioned ice was the most effective for cooling horses’ legs. The Professional's Choice Ice Boot was found to be the most efficient way to administer that ice. The Professional's Choice Ice Boot rose above the others due to its practical design and superior quality neoprene. Elastic pockets inside the boot allow the user to vary the amount and location of the ice depending upon the injury or desired result. The boot is kept securely in place by hook-and-loop closures. The compression of the boot also adds to its effectiveness. According to the DVM Magazine article, “Research shows that compression further reduces edema and swelling and increases the effects of cold therapy.”
To locate an authorized Professional's Choice dealer near you, call 800-331-9421 or visit www.profchoice.com.
Labels: January 2009, Spotlight on the News
Building a Team of Two, Part 2
Horse and rider come back togetherby Allison TrimbleThis has been a great month! Karen and April have made more improvement than I would have thought to hope for. Karen is such an open-minded student and has made a great effort to get to the barn and put in her time in the saddle, whether it is on one of my horses or on April. It has been a real challenge for her to rearrange her schedule, but she has a determination that is really paying off, and this commitment to showing up 3-4 times a week is the biggest change she's made from her earlier training. In less than a month, this team has gone from feeling downtrodden and unable to reach their dreams to being hopeful and moving forward. We had decided in the beginning that it would be a good idea for Karen and April to do some separate learning. For the first three weeks, I rode April and worked on building her confidence, tolerance and maneuvers. It didn’t take long for her to start loping freely and steering well. Her turn-arounds were coming along nicely and she was becoming really trainable and relaxed. It took much less time than I had thought it would to have her settle into the routine. This past week we have started bringing April and Karen back together for a couple of rides. It is remarkable to see the transformation in both of them. Karen is much more confident in her ability to ask a horse to do something and get the desired result. She understands how to keep April between her hands and legs when she is loping circles. With a horse like April, who is really feely and can tend to be a bit nervous, it is crucial to be very black-and-white in your commands. A lot of nervous behavior and fidgeting or unclear commands can add to this type of horse’s apprehension. Karen is getting much better at not picking at April, just correcting her when she needs it and otherwise leaving her alone. Karen's new spurs have made a huge difference. They sit lower on her boots than the old ones, adding about two inches to her legs, and the shank is tipped downward. Now when she goes to use her legs she is able to use her calf without unintentionally spurring and can get her legs under April's belly to cue her instead of jabbing her in the sides. April has proven to have a really nice turn-around. The essence of a good spin is that it is cadent, and the goal is to back off and let the horse do its job. For a lot of people who have not ridden a pretty finished horse, it is hard to comprehend that a horse will turn around without you constantly telling it to do so. Karen learned how to properly spin a horse by riding a couple of my show horses, so it was much easier for her when she went back to April. Another maneuver most beginners have trouble with on their own horses is lead changes. When we were trying to figure out the right program for April and Karen to get the most progress as economically as possible, we decided it was important that April develop a solid lead change before she went back to having Karen as her main riding partner. We decided that one more month of training with me working on her lead changes would be best; during that time, we would start having Karen ride April a couple of times a week as well. One issue with April’s lead change is that she has done a lot of simple lead changes. Every time she goes to change leads, she wants to break down first, and then change. This is going to take a little time to work through and will be challenging for Karen. I want her to learn how to change leads on one of my horses so when April is ready for her to start, Karen will know what to do and how it should feel. The lead change is really the only maneuver I think might cause Karen to get into trouble if she tries it on her own. The circles, spins, stops and rollbacks will be very manageable for her, as long as she keeps up on her riding and takes regular lessons. I think both Karen and I have been pleasantly surprised by how well April has taken to this program. I, for one, am really looking forward to seeing them in the show pen together. Karen Says... "It's been almost a month since I started with this program. I'm enjoying the time in the saddle and feeling more confident. For the first time, I have the belief that I really can do this! We have covered so many aspects of riding that I really hadn’t thought much about: the proper use of spurs, the reasons behind the use of certain bits, and how to find the right equipment for April. Riding April this week after some time apart, I'm amazed at the progress we've both made. I'm excited to get back in the show ring and compete again with confidence. My horse is happy and seems to enjoy her job. This has gone from being something I dreamed of--but struggled with--to a reality. Most importantly, I'm having fun!" Labels: allison trimble, January 2009, On the Plus Side
The Use of Corners
Gymnastic exercises for horse and rider – Part 1by Alice TrindleWhat a fun ride this has been over the past five years, writing for Northwest Horse Source! As I reflect upon the beginning humble conversations regarding the desire to bring the discussions, skills, and exercises of the clinic situation to the readership of the magazine, and now look back over the volume of thoughts, maneuvers, and principles we have expressed through these articles, it is impressive! Our desire these past few years has been to present specific topics that inspire readers to go "Beyond the Basics" to increase their awareness and observation skills and encourage thoughtful practice of specific maneuvers. It's going to be another fun year of reading here in NWHS's "Beyond the Basics" series, so let’s get started with some great January exercises to warm up both horse and rider. Warm it UpEvery true master horseman I have read, or had the good fortune to listen to or watch, has referred to the importance of developing a supple, flexible, strong and athletic horse. In fact, most animals--including humans--seem to be happier, and in the end more relaxed, when they are in shape. In almost every athletic pursuit, we humans are beginning to recognize the importance of not only learning the skills and building strength, but also adding other exercises to gymnastically supple, lengthen and flex. Predatory yoga postures should be commonplace in the gym and in the arena. Previous articles have mentioned good habits to develop in warm-up routines that elastically limber both horse and rider (see www.tnthorsemanship.com/articles - NWHS ‘06 June, August, and September or visit the www.nwhorsesource.com article archives). It is important that we start any routine that gymnastically develops our horse with a mindfulness toward the ultimate goal. For example, if I am looking to perfect my half-pass, I need to select gymnastic skills that supple the ribcage, strengthen the back and hindquarters, and encourage balance in the shoulders with extension in the forelegs. With a clear picture of the goal in mind, I can select from a menu of gymnastic exercises to help my horse perform that maneuver. It does not matter what discipline or jobs I want to accomplish with my horse. This attentiveness to understanding the reason for selecting a certain set of gymnastic exercises is critical. Let’s look at two of my favorite gymnastic exercises and thoughtfully examine each one regarding purpose and benefits. (Note: Find diagrams, more exercises and the rest of the story online at: www.tnthorsemanship.com/articles.) Square CornersWhat: Geometrically ride your horse in a square pattern or 90-degree turn. Why: Engage and strengthen the inside hind leg, hip, and hock; flex ribcage, soften jowl, establish outside rein, balance shoulders and prepare for shoulder-in postures. When: I use the Square Corner geometry with horses at all stages of development. For the young horse, it helps to establish patience, get him listening to your aids, and connect both of you to your focus, positioning, and use of the rein right down to his feet. For the advancing horse, I use the Square Corner for a warm-up and reminder prior to shoulder-in postures and exercises. How: Initially, I use the corner of the arena to help me and my horse focus. I ride on the track (let’s say traveling to the right) until I am about three horse-lengths from the wall. At this point, I will ask for a softness in the jowl, a slight bend in the neck to the right (only enough to see the horse’s eyelash!) and begin to start a circle to the right. My balance is ever so slightly in the direction of travel to the right and my shoulders and torso are starting the turn as well. As the front feet begin to align on the new line, I will half-halt or put a bit of suggestion in the outside rein and simultaneously caress with my right lower leg, inviting the horse to step under with his inside right hind foot. At this point my balance is right down the middle of the horse and my outside (left) elbow is just a little heavy. As my horse progresses, I can build this "feel" (riding inside leg to outside rein) into many maneuvers. From sideways or shoulder-in on a circle to actual shoulder-in exercises, Square Corners are a great place to start. Cautions: The most common error we all make in riding is trying too hard! Remember to relax, breathe and keep a positive tension in your body. If you get stiff and rigid, your horse will also. Go back and try baby steps, remembering to reward the slightest try, particularly in the beginning stages. Reverse Bend or Counter-bend CornersWhat: Geometrically ride your horse in a 90-degree change of direction with the nose slightly away from the direction of travel. Why: Free up the shoulders while remaining in balance; flex ribcage, soften jowl, establish outside rein, and strengthen hip and hocks. When: I use the Counter-bend at the same time in my progression as the Square Corner exercise. How: Tracking right as I approach the corner, I will ask for a soft feel in the jowl and slightly tip the nose and eye to the left or toward the outside wall. Next, I will bring my balance slightly to the right and put a ‘feel’ or caress in the right rein. Simultaneously caress with the lower left leg and focus on the right ear of your horse. Once the shoulders have aligned with the new direction--in other words, followed the 90-degree turn--change your aids back to riding a straight line to the right with a slight bend to the right (no more than an eyelash). Cautions: Remember, you are not pushing the shoulders sideways, rather balancing your weight in the direction of travel, inviting the horse to flow into the suggestion of the outside rein. Another pitfall is looking too far in the direction of travel. This tends to put you out of balance with a tip in your shoulders or stiffness in your neck. It will cause the same reaction in the horse. Keep your shoulders parallel to the ground, keep an eye on your horse’s ear, and enjoy the flow. This January as you head out to the arena, try riding both of these gymnastic exercises on your two-leg horse. This will allow you to become flexible and balanced, maybe even rhythmic, before you reach your horse. Once on board, try starting your lesson plan for this entire month with these routines. I will guarantee a better ride with a softer, more flexible and happy horse. Labels: alice trindle, Beyond the Basics, January 2009
Creating the Perfect Paddock, Part 2 in a 3 part series
Watch out for too much waterby Alayne Blickle, Horses for Clean Waterwww.HorsesforCleanWater.com
The perfect paddock is what we all want for our horses, right? Last month we began this series by discussing reasons for creating a winter paddock and where to establish it. This month we'll cover mud and manure control, fencing considerations, safety tips and chore efficiency ideas
Mud and Manure
Keeping your horses in a paddock area in the winter confines manure and urine to a small, manageable area where you have better control over it. Picking up the manure every one to three days will help reduce your horse's parasite load. In summer months it will also reduce flies and insects by eliminating their habitat. Regular removal of manure also greatly reduces the amount of mud that develops. Eliminating mud in the winter is your key to reducing dust in the summer, too. Reducing mud and manure will help prevent contaminated runoffs from reaching the surface and ground water in your area as well. The manure you pick up can be composted and reapplied to your pastures during the growing season, another plus for your pasture management program!
Footing is the next important consideration for paddocks. Using some type of footing, at least in the high traffic areas, will reduce mud by keeping your horse off the soil surface, thereby avoiding erosion. Hogfuel or wood chips can provide an excellent footing. These wood products can be good environmental controls, too. Through the natural composting process, they contribute to the breakdown of the nitrogen in the horse’s urine and manure. This process eliminates the urine smell often present in outdoor confinement areas. Gravel (crushed rock, no larger than 5/8”) works well, particularly in wetter conditions where hogfuel will break down too quickly. Gravel surfaces are very easy to pick manure off of. Sand is also a popular footing choice and is more available in some parts of the country. Avoid feeding on sandy surfaces, as ingesting sand (or mud and dirt) with hay can result in serious sand colic problems and expensive vet bills. Sand also drains poorly and is dusty in the summer. A good sand choice would be a coarse, washed sand.
There are many possible footing materials for different parts of the country. In choosing footing, some considerations include:
• Will it be a suitable, safe surface for my horse to run, stand and lie on?
• Can I easily pick up manure from the footing material?
• Will the footing material contaminate my compost pile in any way?
• Will it be very dusty in the dry months?
• What is the cost and availability?
• Is it in any way toxic to horses, humans or other animals?
You might want to try a combination of footing types, perhaps using gravel in the high traffic areas and hogfuel in the rest.
Water Control
Install rain gutters and a roof runoff system on your barns and shelters and divert rainwater away from your horse’s confinement areas. This will seriously reduce mud and prevent manure and urine from being washed out of the paddock. In an area that gets 39 inches of rain annually, 8,125 gallons of rainwater will run off a two-stall run-in shed in one year. If you divert that much water away from your horse’s confinement area, you are greatly reducing the amount of mud you have around your horse. Divert clean rainwater to an area on your property where it can percolate back into the natural hydrology of your land – a vegetated area or an unused corner of your pasture.
As you choose the location and size of your paddock, keep in mind that there will still be some surface runoff. You can help control runoff by locating your paddocks so they are surrounded downslope by at least 25 feet of lawn, pasture, woods or even a garden. Vegetation in these buffer areas will act as a natural filtration system to help slow down runoff and reduce sediments and nutrients.
Safety Considerations
Use the very safest fencing you can for your paddocks. While wood fencing is attractive, in a confinement area it often offers the temptation for chewing. Whatever type of fencing you choose, you may want to reinforce it with some type of electric tape or hot wire as a psychological barrier. Horses are hard on fences and will test most types, but tend to respect electric fencing.
Building corners and walls should have no protruding objects on which the horse can get hurt, like bolt ends, nails, boards or the tops of metal T-posts. Also watch out for the corners of roofs and the bottom edges of metal buildings. There should be no wires or cords hanging in the paddock and absolutely no junk, garbage or machinery. Keep in mind that gates on fences need to be adequately sized for the types of truck deliveries you expect (such as gravel, hogfuel, hay, etc.).
Efficiency
A chore efficient aspect you can add to your perfect paddock is good outdoor lighting. This is best installed during the summer months, but most appreciated during the winter. Proper lighting helps you get your winter manure management chores done sooner and more efficiently, leaving less manure behind to turn into muck.
Chore-efficient equipment will also help with your perfect paddock. There is nothing worse than cleaning a stall and paddock with a manure fork with broken and missing tines – except perhaps working outside while freezing. Invest in a wood-handled (easier to grip in the cold) manure fork that will help you get the job done quickly and easily. A warm, insulated waterproof jacket, wool hat and insulated waterproof gloves with grips are also essential tools.
Next month we wind up this series by discussing how to integrate your perfect paddock into your management system, along with tips for dealing with horse boredom.
Labels: alayne blickle, Horse Farm Management, January 2009
Healthy, Natural Shine
Six natural ways to give your horse's coat a vibrant shineby R. MatthewsYou’ve seen them. You’ve admired them. You’ve wished your horse looked like one of them. Them being the slick, shiny horses you see paraded on TV in numerous horse shows, on the covers of glossy magazines, in dressage rings, and out in green-laden pastures under bright, sun-filled blue skies. It isn't magic. You can get that gleaming look with minimal trouble. Here are six simple tips to get that super horse shine through natural, healthy means. Choose one or combine a few to give your horse the gleam that you know is in him. Vegetable OilsMost people know that vegetable oil is the number one way to bring out the shine in a horse. Half a cup of oil in your horse's daily feed will make that coat shine with the best of them. Black oil sunflower seeds, corn oil and rice bran oil are all as effective as vegetable oil. A word of warning: oil is high in fat. If your horse doesn’t need the extra calories or packs on unneeded weight, you might consider one of the other options. BrushingBrushing your horse is a great way to spend some quality time together while you bring out the natural oils in his coat. A good deep brushing that utilizes a curry comb (or its equivalent: a stiff-bristled brush and a soft-bristled brush) will bring up the hidden dirt, dry skin, and old hair. It will also stimulate and release the natural oils in your horse’s coat. This is a great way to relax with your horse after a long day. Keep Him CoveredSunlight bleaches; it is a fact of life. Your hair lightens in the summer, and so does your horse’s hair. When that Northwest sun is shining, consider keeping him in during the height of the day and turning him out in the late afternoon and evening. If this is not an option, try a lightweight blanket. Winter weather can also take its toll on your horse, and a durable blanket can protect the fragile hair. When spring comes around, invest in a good shedding blade to remove extra hair and promote new growth. Use Your Natural Oils
Another great option, especially if you are short on time, is to hand brush your horse. That's just what it sounds like: brush your hands over your horse's coat, smoothing the hair with your palms and fingers. This is a quick, efficient way to transfer the natural oils from your hands directly onto your horse’s coat. Towel to BrushThis is another quick fix when short on time. It is also an easy, effective way to finish off a serious grooming session. Take a soft towel or rag and wipe down your horse. This will remove excess dirt and smooth out the hair. Do not wash the rag; it will start to collect the natural oils from your horse’s coat and bring out the shine. Don’t Over-washIf your horse’s coat is starting to look dull, even with all the grooming and extra care, you might take a look at how often you are washing him. A quick spray-down with the hose to cool him off on the hot days of summer won’t do any harm, but a deep-cleaning wash too often with shampoos will strip the natural oils from his coat and leave him looking dull. Instead, consider giving him a bath with a little cider vinegar and a squirt of baby oil in a bucket half full of water. Don’t overdo the baby oil, though. It can clog the pores, blocking the release of natural oils. Sponge it on and squeegee it off. It will leave your horse silky and bright. All it takes is a little time and attention to give your horse a natural healthy shine. None of these methods are expensive, and most are a great way to spend some quality time with your horse. About the AuthorR. Matthews is a freelance writer living in southern Idaho where she breeds, raises and sometimes shows American Quarter Horses. She has written for equestrian magazines such as EQUUS and enjoys mindless rambling on ranch life at her blog: http://forloveofahorse.wordpress.com. Labels: Equine Wellness, January 2009, r matthews
Standardbred: A True American Breed
The origins of the Standardbred trace back to Messenger, an English Thoroughbred foaled in 1780 and later exported to the United States. Messenger was the great-grandsire of Hambletonian 10, to whom every Standardbred can trace its heritage. Standardbreds are a relatively new--but true American--breed.  The name "Standardbred" originated because the early trotters were required to reach a certain standard for the mile distance in order to be registered as part of the new breed. The mile is still the standard distance covered in nearly every harness race. While Thoroughbred racing has long been known as the sport of kings, the dependable, athletic Standardbred brought racing to the common man, first between neighbors on community roads, and later at state-of-the-art racetracks. In many respects, the Standardbred resembles the Thoroughbred. However, it is often more muscled, longer in body, and does not stand as tall, averaging between 15 and 16 hands. The head is bigger and may even sport a Roman nose. This breed appears in varying colors, although bay, brown and black are predominant. Standardbreds weigh between 800 and 1,000 pounds and are known for their docile personalities and willing temperaments. Standardbred RacingStandardbred racing is contested on two gaits: the trot and the pace. Pacers move in a lateral gait, which means they move both legs on the same side forward in unison. Trotters move in a diagonal gait. For example, their left front and right rear legs move forward simultaneously, and then the right front and left rear legs follow together. Any trotter or pacer who breaks into a canter or gallop during a race must be pulled back to its correct gait and lose ground to its competitors or be disqualified from the race. Information and photo provided by the US Trotting Association, www.ustrotting.com. Labels: Breed Profile, January 2009, nwhs staff
Think Before Breeding
Consider several factors before you decide to breedby R. Paul Schwab, D.V.M., Kulshan Veterinary HospitalBreeding horses, especially with artificial insemination, takes a fair amount of preplanning and organization. What stallion to breed to? Artificial or natural cover? How much does it cost? How old is the mare? What potential medical problems may come up when your mare gets close to foaling? Do you need to take on the responsibility of another horse? What about all the unwanted horses right now? My original intention was to discuss the typical pre-breeding considerations, but then I started thinking about what is going on right now with the horse population and the economy, and I thought it better to step back and look at what we can do to address the unwanted horse issue. There has been a growing concern to the point of epidemic about horses that are unwanted. Unwanted horses may be classified in several ways: • Older “retired” horses that are healthy but need more care than the owner can give • Unsafe horses with behavior issues • Horses that have decreased use because of musculoskeletal issues or other medical problems • Bureau of Land Management mustangs and burros that are not adopted out • Perfectly normal horses, young and old, that cannot be cared for because of lack of room, money, food, or time This last one is where I would like to focus some attention. The market is flooded with these horses, and they can be difficult to sell. Over the last year, feed costs and fuel costs have risen to an all-time high, and unfortunately the horses are the ones that suffer. Our clinic has definitely seen a rise in rescue horse farm visits this year, especially during the months when pasture was scarce. Reports are very common about abandoned horses left to scavenge on their own or dropped off into other people’s pastures. Basically, people can’t afford to raise the horses they already have, and the market is full of horses to sell. Consider Before BreedingThe American Horse Council estimated that there may be 9.2 million horses in the U.S. right now. Approximately 90,000-100,000 horses were slaughtered annually before the slaughter ban in the US. What does this mean? There may be additional 90-100,000 horses per year in need of homes. I don’t want to discourage all breeding. The horse industry needs the constant exchange of horses to stay alive, not to mention the genetics that can be improved annually by experienced breeders. A huge part of the equine economy is based on breeding horses and raising foals. My own job partly depends on the constant cycle of breeding and the prevention and treatment of diseases in the growing foal. Just consider what is involved in breeding a mare, caring for and training a young horse, and what you will do with that horse when it has grown. It takes almost a year from breeding to the delivery of a foal and another two years to have a horse to ride. That's three years of breeding, training, feeding, and health care expenses. Ask yourself if you could adopt a horse and get the same results or find a horse at a reasonable price. Do you want to breed your mare because she is awesome and it would be cool to get a foal out of her, or is there some other reason? Are you contributing to the problem by over-breeding? This is certainly a complicated and controversial issue, but it is one we should all be involved in. For more information on unwanted horses, the American Veterinary Medical Association and the American Association of Equine Practitioners both have sections on their websites with information and links. The Unwanted Horse Coalition ( www.unwantedhorsecoalition.org) has a great website dedicated to this issue. Labels: Doctors Corner, January 2009, Kulshan veterinarians, r paul schwab
Wild Hoofbeats: America's Vanishing Wild Horses by Carol Walker
 Wild horses: bold, elusive, independent, and above all, free. Or are they? Most of us consider wild horses honored emblems of our Western spirit, but some see them as a resource to exploit or even a pest to eliminate. Which are they? For Carol Walker, the photographer and author of Wild Hoofbeats, the answer begins not in abstract argument over symbols and statistics, but with the horses themselves. In images that move fleetly from the pages straight into our hearts, Walker brings to brilliant life the horses of the Adobe Town herd in Wyoming’s Red Desert, and we gain a priceless perspective on these graceful, courageous animals. Walker gathered these dynamic images over years spent observing (sometimes at a distance, often within a mere stride or two) the bands of the Adobe Town herd. She emerged from her experience with a sense of personal acquaintance with the horses, a deep respect for their social allegiances and intelligence, and a heart fully engaged by their plight. As art, the photographs are elegant. As documentary, they are evocative. In every respect, they are indelibly memorable. Painted Hills Publishing ISBN: 978-0-9817936-4-1 160pp. TPB www.wildhoofbeats.comLabels: January 2009, NWHS Book Barn
Dressage Horse Warm-ups
Successful schooling begins with a proper warm-up
by Jane Savoie
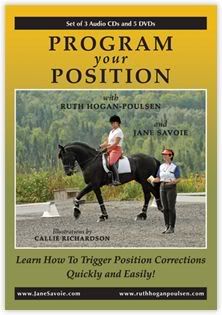
Many riders are confused about how to warm up their dressage horses so they can have a productive schooling session. As a rider and trainer, your goal in the warm-up is to take the restrictions away from your dressage horse's body. Depending on the day, your warm-up could be as short as ten minutes, or it could end up making up your entire ride.
Here are 9 tips to help you with your warm-ups:
1. Since your horse has probably been standing in the stall, spend the first five to ten minutes walking around on a loose rein.
2. After walking around "on the buckle" for several minutes, pick up a contact so you can begin your warm-up.
3. Focus on the first three ingredients in the Dressage Training Scale: rhythm, suppleness, and connection. I always start my work with those first three ingredients on a large circle. Then, if all goes well, I'll go large around the arena.
4. Rhythm: As you walk, trot, and canter, check that the rhythm is always regular and the tempo is neither too fast nor too slow.
5. Suppleness: Spend as little or as much time as you need to supple and relax your horse both mentally and physically. Work done in tension is a waste of time. When you supple your horse, you'll relax him physically. Once he's physically relaxed, he'll relax mentally.
In a nutshell, to supple your horse, bend his neck seven inches to the inside of a neutral position (neutral is when his nose is in line with the crease in the middle of his chest) while you close your leg on the same side.
Do a set of "three supples," meaning you'll bend and straighten him three times quickly but smoothly. Then do nothing for seven or eight strides, followed by another set of three supples. (This "suppling" technique is described in detail in Cross-Train Your Horse, Train with Jane Volume 1, and A Happy Horse Home Study Course.)
6. Connection: Use the connecting half halt to put your horse on the bit. The connecting half halt is the version of the basic half halt (a momentary closure of seat, legs, and hands) that puts your horse on the bit.
Close your legs steadily for three seconds as if asking for a lengthening; close your outside hand in a fist to capture and recycle the energy back to the hind legs. Keep the neck straight by giving three to four little squeezes or vibrations on the inside rein. The connecting half halt lasts approximately three seconds. During those three seconds you add, add, add hind legs through your closed outside hand while maintaining flexion at the poll to the inside.
In warm-up, I connect my horse and ride him long and low; or, if he tends to be heavy on the forehand, I ride in a horizontal balance with his topline parallel to the ground.
7. When things fall apart, always go back to the beginning of the training scale. First, reestablish regular rhythm. Then, supple your horse. Finally, ask for connection.
8. While focusing on rhythm, suppleness and connection, it's appropriate to ask the training level horse to do school figures like circles, serpentines, and shallow loops.
The first and second level horse can do school figures as well as leg-yields and rubber band exercises like gentle lengthenings. From these maneuvers, come back to the working gait.
9. Many riders do a lot of transitions from gait to gait with their dressage horses in the warm-up. Personally, I think your horse needs to be warmed up sufficiently before you can expect him to do good transitions. I save schooling the transitions until the second phase of my work, after the warm-up is complete.
This article originally appeared online at EzineArticles.com, reprinted with author's permission.
Labels: In Plain English, jane savoie, January 2009
Foaling and the First Hours
What you need to know for a smooth foaling processby Alesia Willard As spring draws near, it is time to prepare for the foals that will soon arrive. Whether this is your first foaling or your tenth, you need to be properly equipped and ready to handle any complications that might arise. Be PreparedHere are some things that should be done before the big day: 1: If the mare is foaling in a stall, make sure it is thoroughly cleaned and bedded with straw. Do not use shavings, as they can stick to the mare or foal and cause a variety of problems. 2: Make sure your mare, whether maiden or not, is accustomed to having her milk bag handled so she will allow the foal to nurse. 3: Have a foaling kit prepared. The kit should contain the following... Labels: Cover Stories, January 2009
|
|


